
Here
is my promised, step by step, instructions on how to paint furniture. I want to
remind you that if you put your mind to it, you really are capable of doing
this, don’t be scared and just dive in and you will be amazed by the results.
{For the four people that read this blog, one of you has already lived through this in picture texts in real time, so to my dear therapist T, thank you, I love you, and feel free to skip this post.}
All
right, so let’s get in to the spectacular details. I used these instructions from John and Sherry of Young House Love, my King and Queen
of DIY. They are awesome, everything they touch is awesome, and I figured if it
worked for them it will (hopefully!) work for me. And ladies and gentleman, it
worked. So it will work for you too. Read these instructions, grab a paintbrush
and some ugly furniture and just do it!
A reminder of the ugliness we were starting with:

Step One: Picking a paint color.
I’ve
actually had a few people ask me to help them pick paint colors recently, because
they thought I would be good at it. Colors are a personal preference but there is definitly a right way of doing it. Like starting any project, picking a color
can be very scary because you don’t want to make a mistake. My biggest advice
to anyone while picking a color is to get the paint chips and bring them home
with you! Don’t make any decision right in the store, because the color you are
seeing there will look COMPLETELY different in your own home. I made this mistake
in my first apartment and ended up with a light blue accent wall that was
supposed to be grey. Years later, and still a grey lover, at the start of this project I got some different grey tones, brought them home, taped
them up, and then stared at them for a day or so.

I
asked Moshe, my five year old, which color he liked best. To which he replied, “These
are not colors, they are all grey and black.” In the end, Daniel and I landed
on a color we loved without Moshe’s help. It’s not one of the paint chips in
the picture above because I actually went to Lowe’s for a second round of chips
after not loving any of the Sherwin Williams colors above. The color I chose
was Eddie Bauer Home’s Vintage Grey (using Valspar paint.)
Step
Two: Removing hardware, and using wood filler.
There
were just so many ugly things that were wrong with this breakfront. The pulls on
the bottom piece had an extra metal plate screwed into the cabinets which made
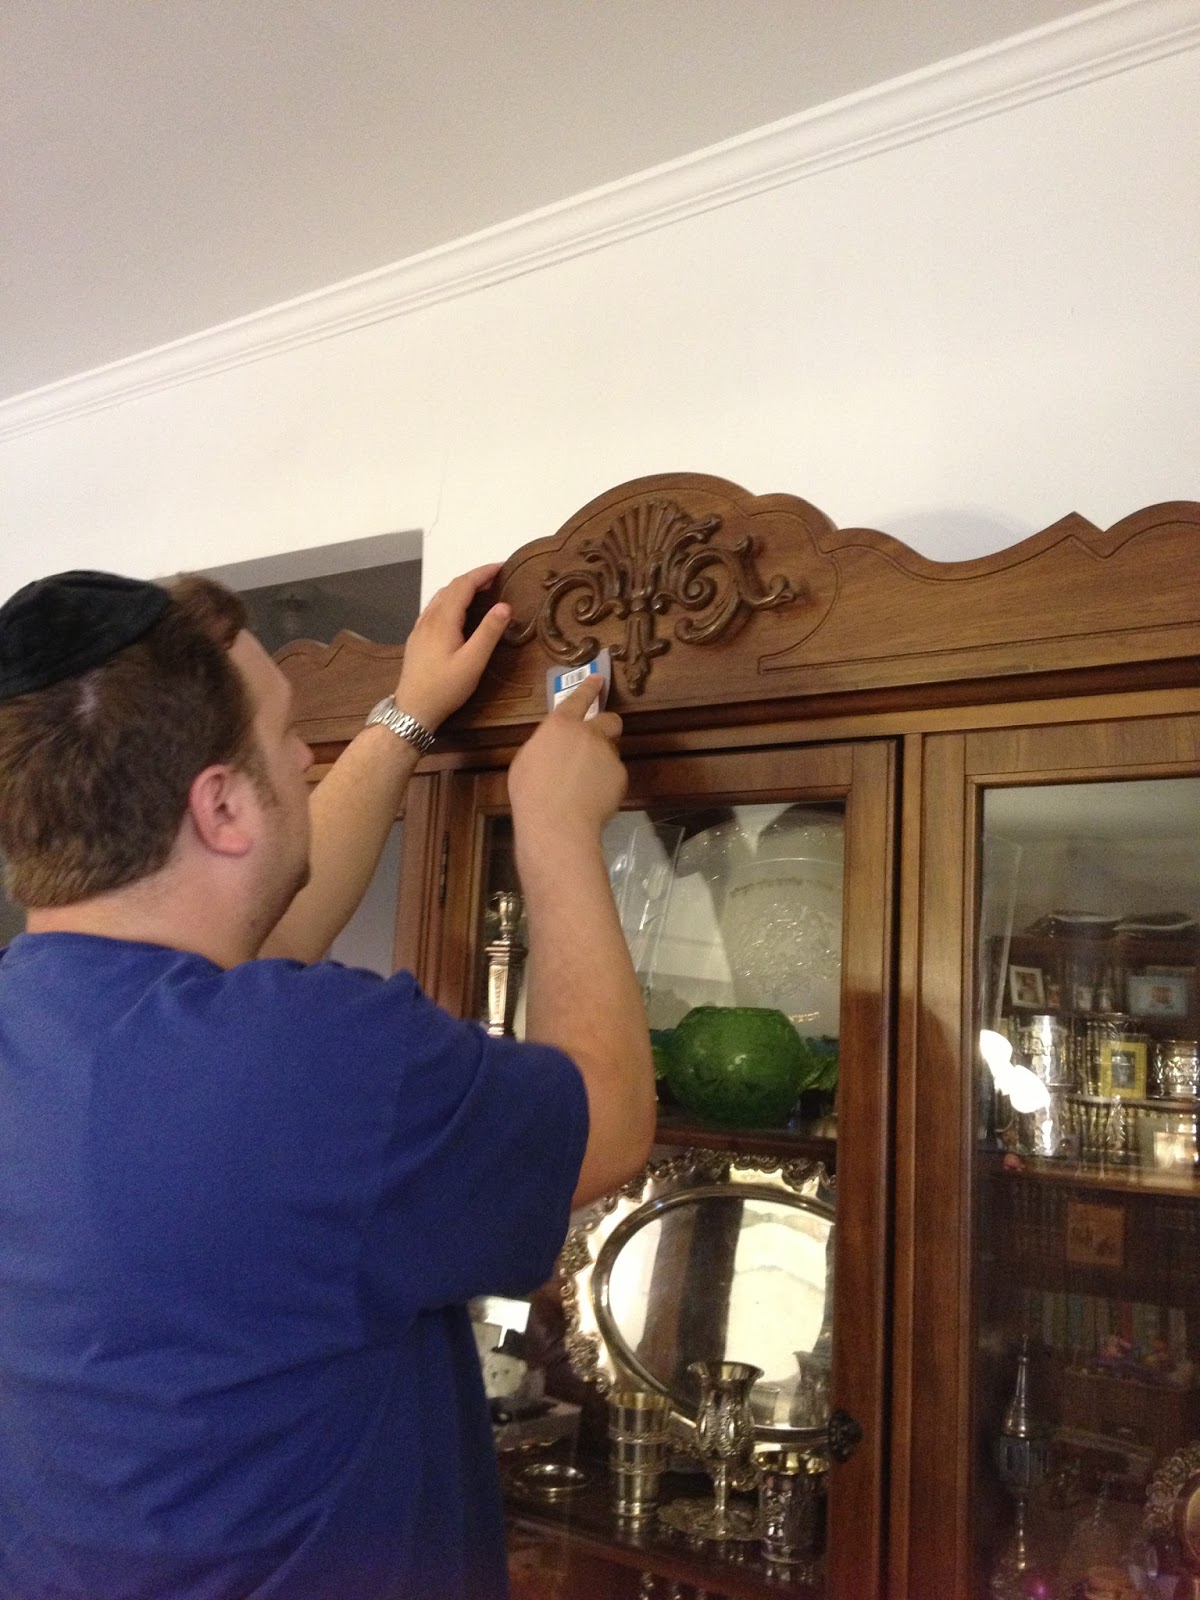
it look clunky and super outdated. The top piece had an elaborate wood carving
that I really couldn’t stand.

You can also see how badly damaged and
chipped the wood was in this picture. But don’t worry we’ll be fixing that at
the end of this step.

I
unscrewed the of the cabinet pulls and then used the back of the hammer to
get the tiny screws out of the metal plate that was still stuck on the cabinet.
When that piece was off, it was already looking better.
My
amazing 6’3” husband took care of the demented owl part. He stuck a spackle
knife under the wood and then yanked as hard as he could until it came off. A
word of caution: It came off in a few flying pieces so it would probably be wise
to wear protective eye gear for this step. (Look Mom! I’m telling people to be
safe so they don’t end up in the hospital like moi. I hope you’re proud!) There were
nails sticking out of the furniture from the inside, that he pulled out with
pliers.
Once
all of the hardware and decorative wood was off, I was left with a lot of holes
to patch. The breakfront was also chipped in some spots, so this is when wood
filler comes in and saves the day. I used Elmer’s ProBond Professional Strength
Woodfiller. Using a spackle knife, you just apply some of it in your holes or
chips and allow it to dry. You then sand it down, and it’s like there was never
anything wrong with the wood. Magic, I tell you.

Step Three: Sanding.
Many people say that sanding is the worst part of a project. I am going to respectfully disagree with all of you people. The worst part of a project is actually cleaning up the sanding job. Really. It’s terrible. I spent an entire afternoon sanding the bottom part of the breakfront by hand. My arm was very sore after but I felt so accomplished. Until my brother in law came over that night to help us get the breakfront out onto our covered porch were I was going to be doing the paint job. He knows a thing or two about DIY, and apparently my sanding didn’t really do anything because I didn’t put enough oomph into it. My very sore arm and I were extremely sad. Said brother in law ended up saving the day because he had a hand sander that I borrowed which made the job much easier and faster. Especially because Daniel ended up doing the sanding because the vibrations from the machine made my (very weak?) arms feel not so great. This is also a step where goggles and a mask are advisable. I used 80 grit sandpaper for this step. I found cleaning up all the sawdust to be an extreme pain and felt like no matter what I was doing it was never going to be clean. I ended up using a tack cloth (whick is a sticky piece of fabric that grabs on to the dust) and it really helped. When your newly sanded furniture is squeaky clean, you’re ready for the next step.

Step
Four: Priming
Using
a brush or a roller (I used a combo of both) Cover your entire piece of
furniture in a THIN layer of oil based primer. I used Kilz. Surprisingly, I
have nothing else to say about this step, so moving on to the main show:

Using
latex based paint, and a brush or roller, paint two (or three if needed) THIN
coats of paint. You need to leave 2-4 hours of drying time in between coats. For
the grey I did two coats, but the inside needed three coats of white for even
coverage. There comes a point where you really just want to just throw down your roller and be done painting,
and to see the finished product, but don’t give up and just continue rolling
those thin coats of paint.
I also added a dipped legs affect by using painters tape and painting the legs and bottom part of the breakfront silver. It’s a little hard to see in the pictures, but this is one of my favorite parts of the makeover.


This
is just the putting everything back together step. We needed to reattach the
doors and put on some new hardware. I got mint green glass knobs from Anthropologie
which I am completely in love with. They really helped make everything be more
modern and clean looking. Sometimes it’s ok to splurge on overpriced knobs.
Especially when your furniture was free to the free-o.


Since
I did the painting on my porch, I had the help of some of our really awesome friends/neighbors who assited Daniel with dragging this heavy piece of wood in and out, which is
something I was really not capable of doing. I did these steps from start to
finish on the two pieces of the breakfront separately, until I got to put them
together to see the final result. When the top was finally finished and ready
to come in, we somehow got a really awesome friend to come over here at 10:30
pm to help with the moving. His wife is a night shift nurse and was working
that night, so I went over there to watch their kids, and he came here to do
the heavy lifting. They probably don’t know why they ever became friends with
us, but thanks guys, we really appreciate it.
Putting
everything back together and staring at your masterpiece is a really awesome
feeling. Lily would walk by the newly painted furniture and yell “YAAAY!” the
first day it was back inside, so it was great that even the littlest one around
here liked how it turned out. And I may have a tiny DIY partner in the making.

Have I convinced anyone that they’re capable of doing this? Any questions just leave a comment below and I can hopefully help you out!
5 comments :
1) your post was 10,000x better than YHL today.
2) Love the shout out, I feel so much more excited about the breakfront being on the Journey!
3)Never saw a pic of the knob so close up. Swoon.
Oh and that insane name is from HS- no judging.
Incredible. Maybe you can create some new furniture for me? ;)
Even if beadboard is the new wood paneling I could never live up to a YHL post...
I found some new pieces that would look smashing in your living room and we must discuss later
Post a Comment